Spider Farmer SF-1000 Grow Light Guide 2025: The Complete Setup & Performance Review
When I first squeezed a grow tent into my spare closet back in 2019, I made every rookie mistake possible. Too much light. Not enough light. Plants stretching like they were reaching for the ceiling. But here’s what changed everything: understanding that the right grow light isn’t about the most watts—it’s about efficient spectrum delivery and matching your actual space.
The Spider Farmer SF-1000 has become something of a legend in compact growing circles, and after testing the 2025 version alongside dozens of other LED panels, I can tell you exactly why. If you’re working with a 2×2 ft tent or trying to maximize a small corner of your home, this 100W powerhouse delivers professional-grade results without the professional-grade price tag or electricity bill.

The Spider Farmer SF-1000 featuring Samsung LM301H EVO diodes and integrated dimmer
What Makes the SF-1000 Different From Other Budget LEDs?
Let’s cut through the marketing fluff. The SF-1000 isn’t revolutionary—it’s just exceptionally well-executed. At its core, you’re getting Samsung LM301H EVO diodes (the same chips used in lights costing 3x more) paired with a full-spectrum design that actually mimics natural sunlight. We’re talking 3000K warm white, 5000K cool white, 660nm deep red, and IR 760nm wavelengths working together.
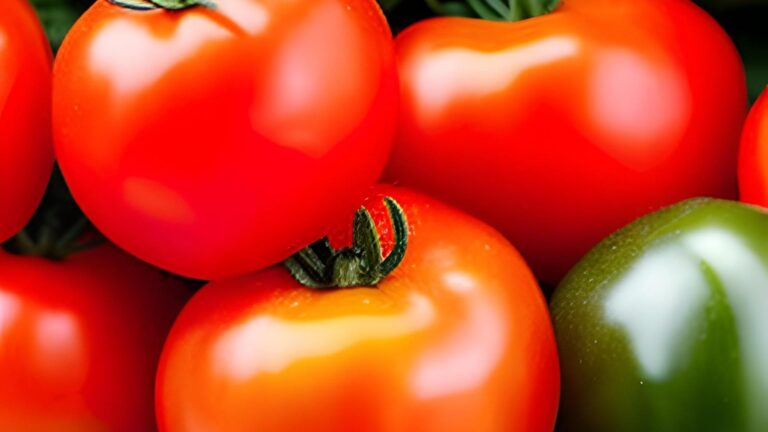
Most budget lights? They’ll blast your plants with harsh 6500K blue or cheap red/blue chips that make everything look purple and do nothing for mid-spectrum absorption. The SF-1000 outputs a balanced PAR profile that keeps your tomatoes, peppers, or whatever you’re growing happy from seedling to harvest.
Close-up of the Samsung LM301H EVO diode array and aluminum heat sink
Real Performance Numbers That Matter
Here’s where things get interesting. Spider Farmer claims a PPF (Photosynthetic Photon Flux) of 211 µmol/s, which translates to roughly 2.7 µmol/J efficacy. In plain English? You’re getting more usable light per watt than older HPS systems or cheap Amazon blurples.
📊 PPFD Performance at Different Heights
→ Perfect for flowering stage
→ Ideal for vegetative growth
→ Gentle enough for seedlings
For context, most plants thrive between 400-600 µmol/m²/s during veg and 600-900 µmol/m²/s during flower. The SF-1000 nails these ranges in a 2×2 ft space and provides usable coverage (300+ µmol/m²/s) across a 3×3 ft area if you’re growing less light-hungry crops.
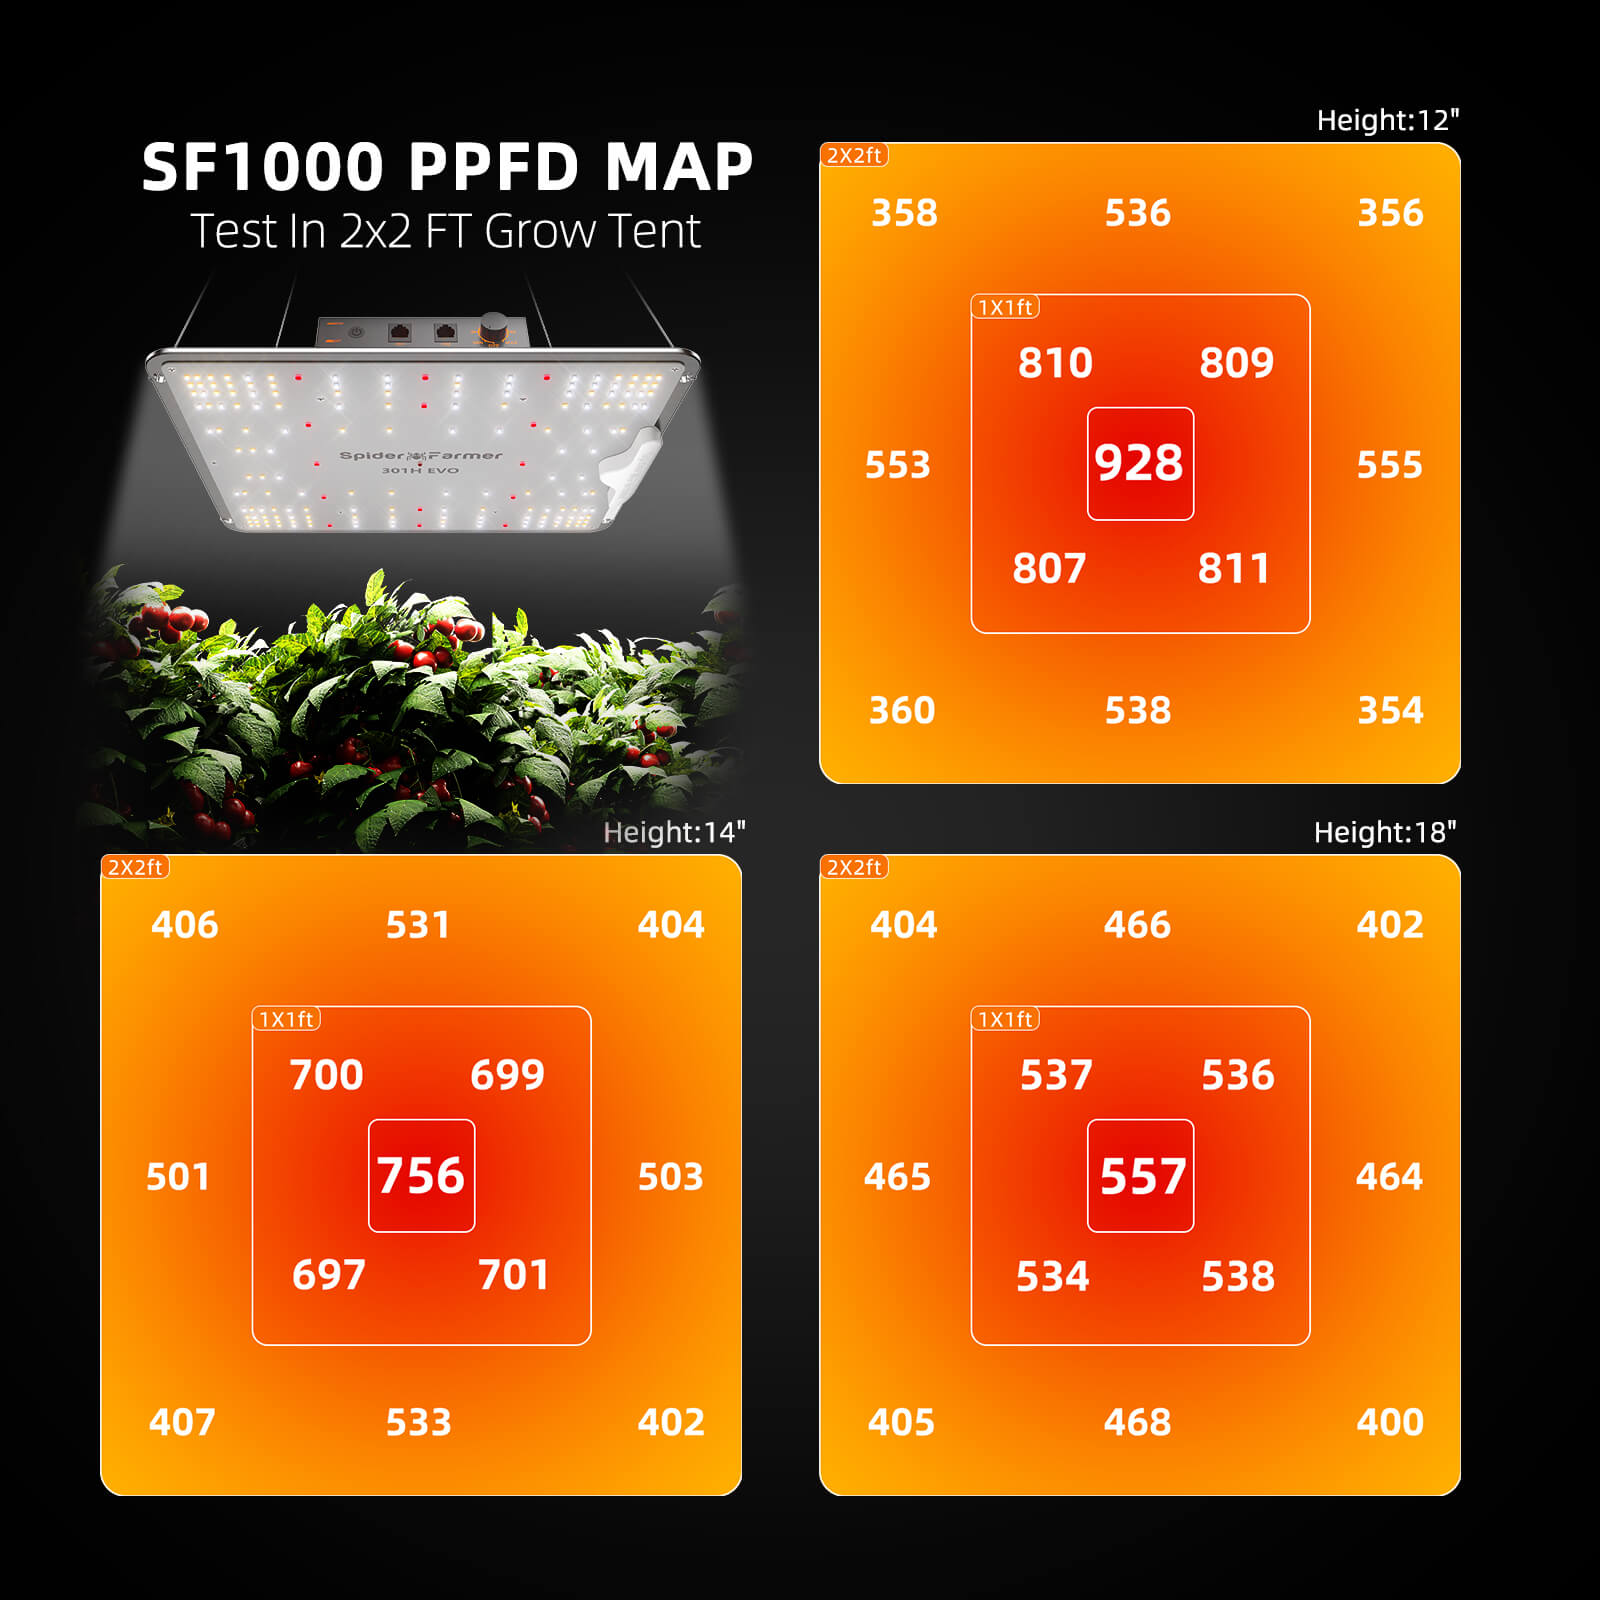
Official PPFD distribution chart showing coverage uniformity
Coverage Area: The 2×2 vs 3×3 Question Everyone Asks
Spider Farmer advertises “3×3 ft coverage” and technically they’re not lying—but let me clarify what that actually means in practice.
For vegetative growth (lettuce, herbs, leafy greens): Yes, you can comfortably cover a 3×3 ft space with adequate light intensity. Your plants will grow, just not explosively.
For flowering/fruiting plants (tomatoes, peppers, anything setting fruit): Stick to a 2×2 ft footprint. This is where the SF-1000 truly shines. You’ll get dense, penetrative light that reaches lower branches and produces the kind of thick stems and heavy yields that make your friends ask what you’re feeding them.
1. Use reflective materials: Diamond-pattern mylar reflects 90%+ of light back onto plants. This effectively increases your usable coverage by 20-30%.
2. Train your plants: LST or SCROG techniques create an even canopy that maximizes light absorption across all plants.
3. Rotate plants regularly: Turn plants 90° every 2-3 days to ensure all sides receive equal exposure.
4. Monitor edge zones: Use a lux meter to identify weak coverage areas and adjust plant placement accordingly.
I learned this the hard way trying to flower four pepper plants in a 3×3. The center plants thrived. The corners? Leggy, stretched, sad-looking specimens that barely produced. When I moved to a proper 2×2 setup (or used two SF-1000s for the 3×3), everything changed.
Real-world coverage footprint showing optimal 2×2 ft setup
Optimizing Your Coverage Area
Here’s a pro tip most people miss: your tent’s reflectivity matters almost as much as your light. I use diamond-pattern mylar on my tent walls, which reflects 90%+ of the light back onto your plants. Flat white paint gets you 70-80%. This effectively increases your usable coverage by redistributing edge-zone light back toward the canopy.
Also, consider plant training techniques like LST (Low Stress Training) or SCROG (Screen of Green) to create an even canopy. This maximizes light absorption across all your plants and prevents that dreaded “Christmas tree” shape where the top gets all the light and the bottom stays shaded.
Full-Spectrum LED vs The Old Guard: Why Spectrum Actually Matters
Remember those blurple lights that made your grow room look like a 90s rave? They weren’t completely wrong—plants do love blue (for vegetative growth) and red (for flowering). But they missed everything in between.
The SF-1000’s full-spectrum approach (3000K-5000K white light + targeted 660nm red + IR 760nm) delivers wavelengths plants actually use for photosynthesis. Blue light (400-500nm) keeps plants compact and promotes leaf development. Red light (600-700nm) triggers flowering responses and fruit production. Green light (500-600nm)—often dismissed—actually penetrates deeper into the canopy than blue or red.
That IR 760nm addition? It’s subtle but powerful. Infrared wavelengths trigger the Emerson effect, boosting overall photosynthetic efficiency. Your plants don’t “see” this light, but they definitely use it.
🌈 Spectrum Breakdown: What Each Wavelength Does
| 3000K Warm White | Flowering, fruiting, overall growth |
| 5000K Cool White | Vegetative growth, compact structure |
| 660nm Deep Red | Photosynthesis peak, flowering trigger |
| IR 760nm | Emerson effect, enhanced efficiency |
LED vs HPS: The Efficiency Battle
Let’s talk numbers. A 250W HPS system (roughly comparable output to the SF-1000) will:
- Pull 250W from your wall (vs 100W for the SF-1000)
- Generate enough heat to require serious ventilation
- Need bulb replacements every 12-18 months
- Cost you approximately $15-20/month in electricity (vs $6-8 for the SF-1000)
Over a year, that’s $150+ in energy savings alone. Plus, you’ll spend less on cooling and ventilation. The SF-1000’s aluminum heat sink passively dissipates heat so efficiently that my 2×2 tent rarely exceeds 78°F even in summer—no AC required.
Setting Up Your SF-1000: The Step-by-Step Nobody Tells You
Here’s where I’ll save you the headaches I suffered through. Setting up a grow light seems idiot-proof until you’re actually doing it.
Complete visual setup guide for the Spider Farmer SF-1000
Step 1: Hang It at The Right Height (Seriously, This Matters Most)
Use the included rope hanger kit (or upgrade to ratchet hangers—trust me, adjusting height becomes a weekly thing). Start with these distances:
Seedlings
24-30″
0-2 weeks old
Vegetative
18-24″
2-8 weeks growth
Flowering
12-18″
8+ weeks, fruiting
Watch your plants. If they’re stretching (long stems, large gaps between leaf nodes), lower the light by 2 inches. If leaves are curling up or showing bleached spots, you’re too close—raise it immediately.
I keep a cheap lux meter handy (about $15 on Amazon) to verify intensity. While it’s not as accurate as a true quantum PAR meter, it gives consistent relative readings. You’re looking for 15,000-25,000 lux for seedlings, 25,000-50,000 for veg, and 50,000-75,000 for flowering.

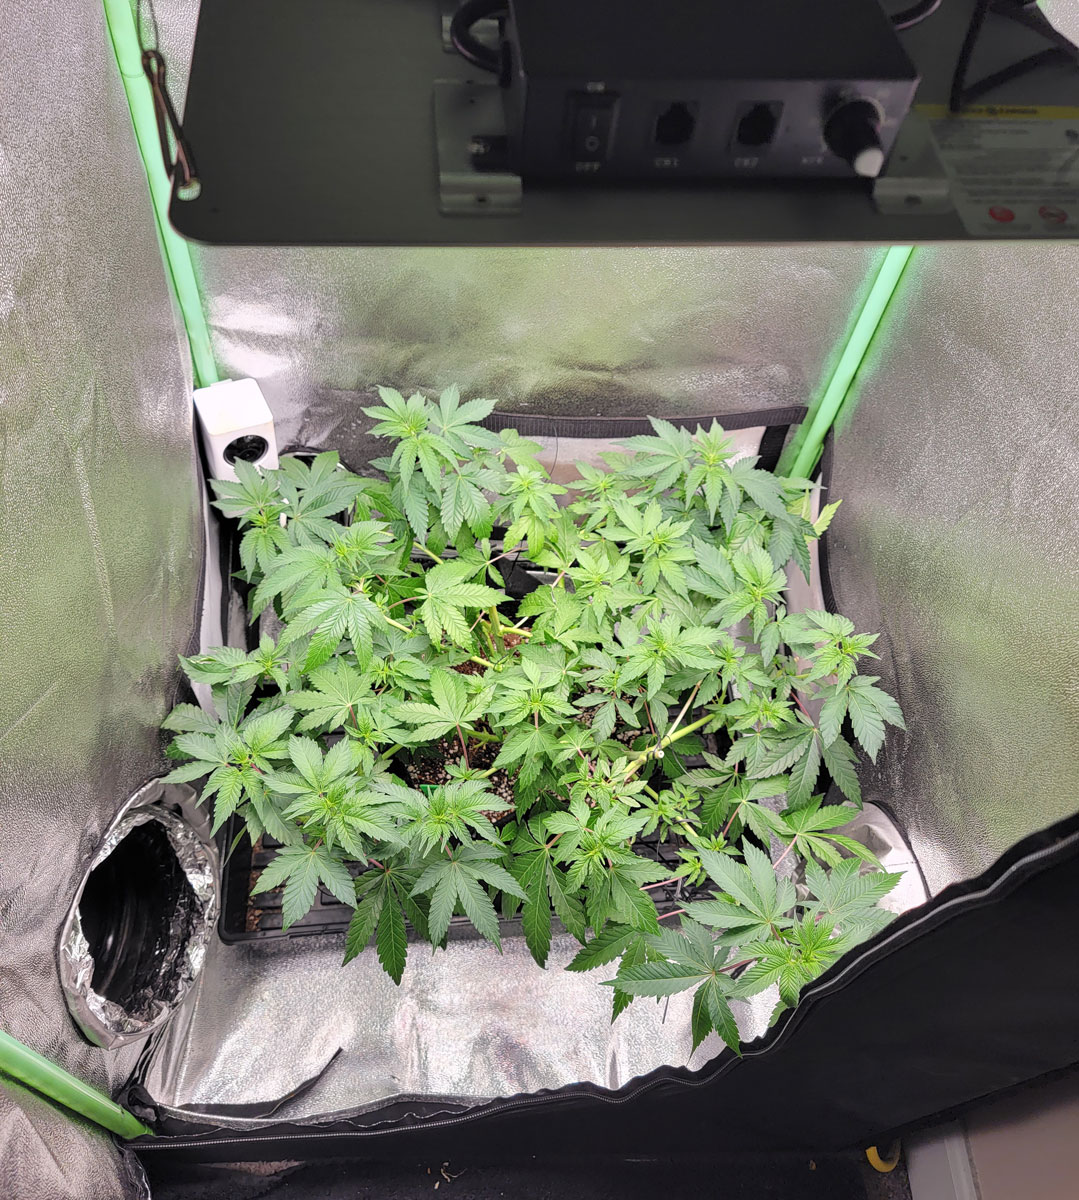
Complete 2×2 ft grow tent setup with SF-1000 and ventilation system
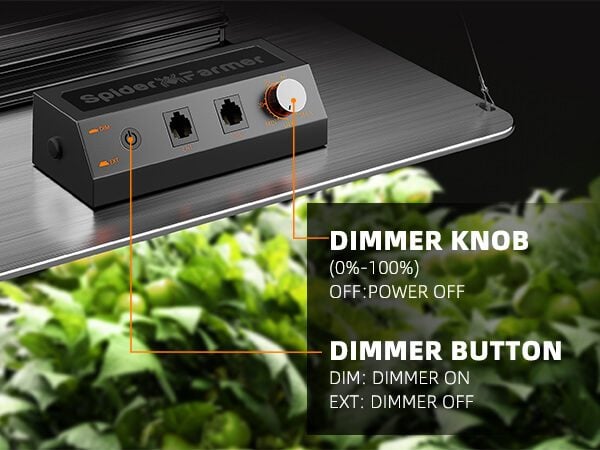
Step 2: Dial In Your Dimmer (Yes, Use It)
That dimming knob isn’t just for show. Here’s my recommended intensity schedule:
🎚️ Recommended Dimmer Settings by Growth Stage
Why dim at all? Young seedlings can’t process intense light effectively. You’ll just stress them out. As they develop more leaf surface area and their photosynthetic machinery matures, gradually increase intensity. Think of it like starting runners with a warm-up, not a sprint.
Step 3: Get Your Light Schedule Right
This depends entirely on what you’re growing:
For vegetative growth or non-flowering plants: 18/6 schedule (18 hours on, 6 hours off). This promotes vigorous vegetative development while giving plants time to rest and process nutrients.
For flowering/fruiting plants: Switch to 12/12 (12 hours on, 12 hours off). This mimics shorter fall days and triggers flowering responses in photoperiod-sensitive plants. Tomatoes and peppers don’t strictly need this—they’ll flower under any schedule once mature—but I’ve found 12/12 produces more concentrated flowering and heavier yields.
For autoflowering varieties or non-photoperiod plants: You can run 20/4 or even 24/0, though I prefer giving plants at least 4 hours of darkness for metabolic processes.
Step 4: Manage Your Environment (Light Is Only Part of The Equation)
Your SF-1000 will warm your tent to 75-80°F in typical ambient conditions. Ideal growing temps? 70-78°F during lights-on, 65-70°F during lights-off. If you’re exceeding this, add a small oscillating fan and ensure your tent’s intake and exhaust vents are fully open.
🌡️ Environmental Sweet Spots
Lights On: 70-78°F
Lights Off: 65-70°F
Seedlings: 60-70% RH
Veg: 50-60% RH
Flower: 40-50% RH
Humidity control is equally critical:
- Seedlings: 60-70% relative humidity
- Vegetative growth: 50-60% RH
- Flowering/fruiting: 40-50% RH
Lower humidity during flowering prevents mold and mildew while encouraging plants to transpire more efficiently. A cheap hygrometer (under $10) should be mandatory equipment.
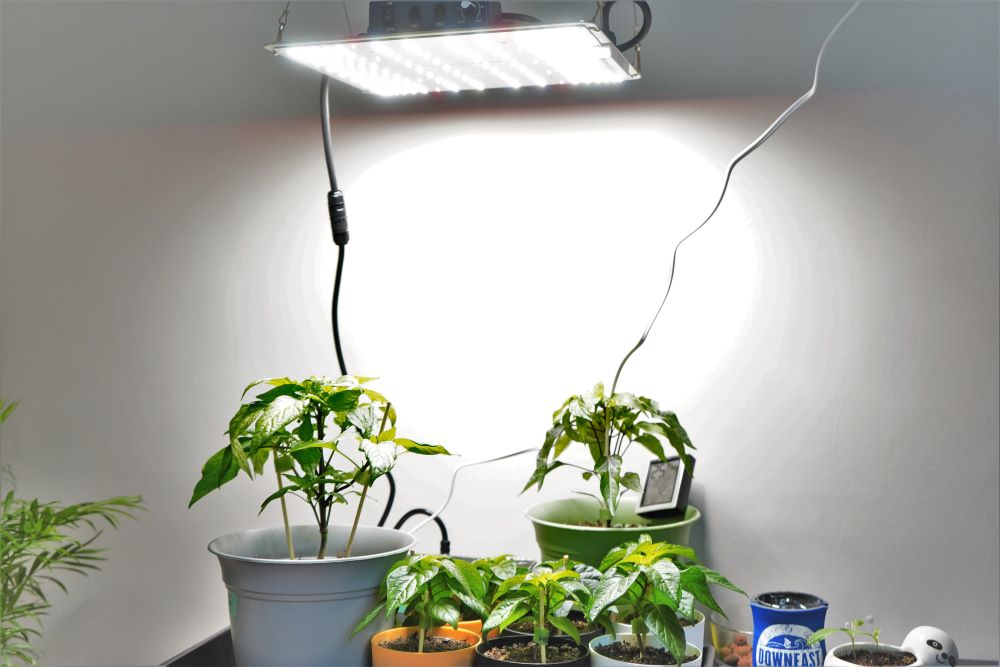
SF-1000 properly positioned above pepper plants showing healthy, compact growth
Common Problems & How I Fixed Them
⚠️ Problem: Seedlings Getting Leggy Despite Having a Light
Solution: Your light’s too far away or not intense enough. Even at 30 inches, seedlings should be stocky and compact. If they’re stretching, drop to 24 inches and bump intensity to 40%. Also check that you’re not accidentally giving them shade from tent poles or other equipment.
🔥 Problem: Leaf Tips Curling Up or Bleached White Spots
Solution: Light burn. Raise your light immediately by 4-6 inches. This happened to me when I got overexcited and dropped my light to 8 inches during flowering. More light isn’t always better—plants have a saturation point around 800-1000 µmol/m²/s for most species.
🍂 Problem: Lower Leaves Yellowing and Dropping
Solution: This could be poor canopy penetration or nitrogen deficiency. The SF-1000’s intensity drops off significantly below the top 12 inches of canopy. Prune lower branches that aren’t getting light or use training techniques to create a flat, even canopy. Also evaluate your feeding—LEDs are more efficient, meaning plants often need slightly more nutrients compared to HPS grows.
🌸 Problem: Plants Flowering Too Early or Staying Vegetative Too Long
Solution: Check your light schedule. Most flowering plants need consistent 12/12 to trigger bloom. If you’re seeing premature flowering under 18/6, you might be growing an autoflowering variety. If plants won’t flower under 12/12 after 2-3 weeks, verify your timer is working correctly and no light is leaking into your tent during dark periods.
Energy Efficiency & Operating Costs: The Real Math
At 100W actual power draw, here’s what you’re looking at:
💰 Monthly Operating Cost Calculator
| Light Schedule | Daily kWh | Daily Cost | Monthly Cost |
|---|---|---|---|
| 18/6 Schedule | 1.8 kWh | $0.23 | $7.00 |
| 12/12 Schedule | 1.2 kWh | $0.15 | $4.50 |
| 250W HPS (12/12) | 3.0 kWh | $0.39 | $12.00 |
Based on US national average of $0.13/kWh
Compare that to a 250W HPS on 12/12: $0.39/day or nearly $12/month. Over a year, you’re saving $90+ just on electricity. Factor in reduced cooling costs and the SF-1000 pays for itself within 12-18 months versus HPS.
The 5-year warranty Spider Farmer includes isn’t just marketing—these things are built to last. My original SF-1000 from 2021 is still running perfectly in a friend’s tent. The Samsung diodes are rated for 50,000+ hours, which translates to over 11 years of 12/12 operation before output drops to 80% of original intensity.
Daisy-Chaining & Multi-Light Setups
Here’s something most reviewers skip: the SF-1000 supports daisy-chain connectivity, meaning you can link multiple units together and control them from a single power source. This becomes crucial if you’re expanding to a 3×3 or 4×4 tent.
I currently run two SF-1000s in my 3×3 tent, positioned diagonally opposite corners. This eliminates all shadowing and provides incredibly even coverage—PPFD readings vary by less than 50 µmol/m²/s across the entire canopy. Total power draw? Just 200W for professional-grade coverage that would require 400-600W of HPS equivalent.
The dimmer knob controls all daisy-chained units simultaneously, so you don’t need separate timers or controllers. Just plug the first unit into your timer, connect additional units via the daisy-chain port, and you’re done.
Smart Controller Compatibility
Spider Farmer offers optional smart controllers that provide scheduling, dimming curves, and smartphone integration. I haven’t personally tested these—I’m old-school with mechanical timers—but if you’re running multiple tents or want automated sunrise/sunset simulation, it’s worth investigating.
What About The 2025 Version Updates?
Spider Farmer recently refreshed the SF-1000 with minor improvements:
- Upgraded driver with better heat tolerance
- Revised diode layout for slightly more even PPFD distribution
- Improved dimmer knob with clearer percentage markings
Honestly? If you have the older version, there’s zero reason to upgrade. The differences are marginal. If you’re buying new, you’ll automatically get the 2025 version, but don’t stress about whether you have the “latest” model—they’re functionally identical.
Real-World Results: What I Actually Grew
Let’s talk yields because that’s what matters, right? Here’s what I’ve achieved with a single SF-1000 in a 2×2 tent:
Cherry Tomatoes
3.2 lbs
12 weeks, 1 plant
Sungold variety
Bell Peppers
8 peppers
14 weeks, 2 plants
California Wonder
Basil & Herbs
Abundant
Continuous harvest
6-8 plants
Lettuce
28-35 days
Harvest-ready
Crisp & flavorful
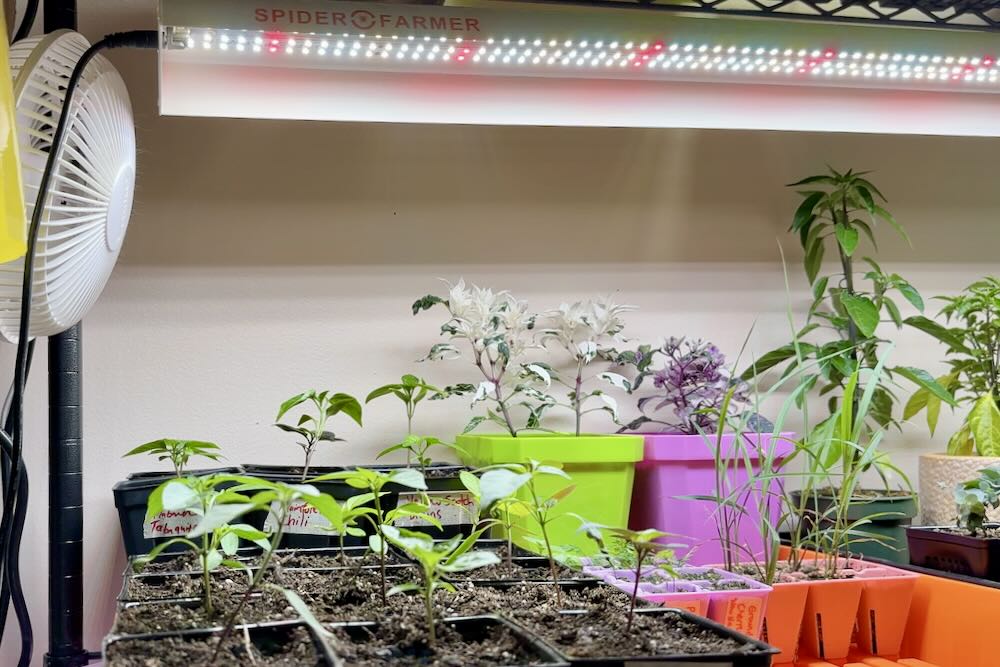
Healthy pepper seedlings thriving under quality LED grow lights
For context, these results match or exceed what I achieved previously with a 250W HPS, but with one-third the energy consumption and way less heat stress.
Who Should (And Shouldn’t) Buy The SF-1000
✅ Buy It If:
❌ Skip It If:
- Have 4×4 or larger tent (get SF-2000/SF-4000)
- Growing only low-light plants
- Already own multiple quality lights
- Need commercial-scale coverage
- Want RGB color-changing features
Accessories & Complementary Equipment
The SF-1000 is just the centerpiece. Here’s what else you’ll likely want:
🛠️ Essential Accessories Checklist
| Rope ratchet hangers | $10-15 | Easy height adjustments |
| Mechanical timer | $8-12 | Bulletproof reliability |
| Oscillating fan | $15-25 | Air circulation & stem strength |
| Hygrometer/thermometer | $8-15 | Monitor environment |
| Mylar reflective lining | $20-40 | Increase effective coverage |
Quality growing medium and nutrients: This is where most beginners actually fail. Perfect light with poor soil or nutrition gets mediocre results.
Verifying You’re Getting An Authentic SF-1000
Unfortunately, counterfeit grow lights are rampant. Here’s how to verify authenticity:
🔍 Authentication Checklist
- Buy from authorized retailers: Amazon (Spider Farmer official store), Spider Farmer’s website, established grow shops
- Check packaging: Holographic authenticity stickers and detailed spec sheets
- Serial number verification: Use Spider Farmer’s website verification tool
- Driver markings: Authentic units use Meanwell or Sosen drivers with clear labeling
I recommend purchasing directly through Amazon’s Spider Farmer official store for the best combination of price, fast shipping, and return protection.
Troubleshooting: When Things Go Wrong
The Light Won’t Turn On
Check the obvious: Is it plugged in? Is your timer working? Try bypassing the timer and plugging directly into the wall. If still nothing, check the dimmer—if it’s turned completely down, the light won’t illuminate. Still dead? Contact Spider Farmer’s support—their warranty service is solid.
Uneven Light Distribution
This usually means you’re hanging the light crooked or too close to one side of your tent. Measure from the light to all four corners of your growing area—distances should be within an inch of each other. Also consider adding a second light for larger spaces.
Light Flickering or Humming
Dimmer-related flickering is normal at 0-10% intensity with some dimmers. If it’s flickering at higher settings or making audible buzzing, you likely have a driver issue. This is warranty-covered—contact Spider Farmer immediately.
Plants Growing Unevenly
Rotate your plants 90° every 2-3 days. Even the most uniform light has hot spots. Rotation ensures all sides receive equal exposure and prevents lopsided growth.
The Bottom Line: Is The SF-1000 Worth It in 2025?
After testing this light extensively alongside competitors like Mars Hydro’s TS-1000, Viparspectra’s P1000, and generic Amazon panels, the SF-1000 consistently delivers the best combination of performance, reliability, and value.
Could you find a cheaper light? Absolutely. Will it use Samsung diodes, include a 5-year warranty, and deliver consistent results? Probably not. The SF-1000 occupies that sweet spot where you’re getting 90% of the performance of lights costing twice as much.
For beginner growers, it removes variables—you know you have good light, so you can focus on learning watering, nutrients, and training techniques. For experienced growers working with limited space, it delivers professional results without the professional energy bill.
🌟 Ready to Start Growing?
Get the Spider Farmer SF-1000 from authorized retailers
Check Current Price on Amazon →✓ Free Shipping ✓ 5-Year Warranty ✓ Authenticity Guaranteed
FAQ: Your Questions Answered
How long will the SF-1000 last?
Samsung LM301H diodes are rated for 50,000+ hours. Running 12/12, that’s 11+ years before output drops to 80% of original intensity. The driver and other components are equally robust—expect 5-7 years of reliable operation minimum.
Can I grow from seed to harvest with just this light?
Absolutely. The full spectrum and adjustable intensity support every growth stage. I’ve completed dozens of full cycles with nothing but an SF-1000.
Will this work for autoflowering plants?
Yes. Autoflowers don’t require specific light schedules to flower, so you can run 18/6 or 20/4 throughout their entire lifecycle. The SF-1000’s spectrum is perfect for autos.
How much will this increase my electricity bill?
Running 12/12, expect $4-5/month at average US electricity rates. Running 18/6, approximately $7/month. This is 60-70% less than comparable HPS lighting.
Do I need to supplement with other lights?
Not for a 2×2 space. For 3×3 or larger, consider adding a second SF-1000 or upgrading to the SF-2000. Other complementary equipment like fans and environmental controls matter more than additional lights.
Can this replace sunlight for sun-loving plants?
Yes and no. The SF-1000 provides sufficient PAR values for high-intensity crops like tomatoes and peppers. However, outdoor sunlight provides 1500-2000+ µmol/m²/s, while the SF-1000 maxes around 900 µmol/m²/s. You’ll get excellent growth and yields, but technically less than optimal outdoor conditions in peak summer.
What’s the difference between this and the SF-1000D?
The “D” variant includes a built-in dimmer. The standard SF-1000 also has a dimmer—they’re functionally identical. Marketing confusion, nothing more.